App window
📘 Opening the App window
Click the GeoDrive icon in the taskbar or in the tray of hidden icons:

If required, log in.
Select either the icon for Settings.
Or select Menu.
📘 Checking What’s New
When a new version is available, the release notes can be checked for new features.
Click on ![]() to view information about new features.
to view information about new features.
Click on ![]() to dismiss the feature announcement.
to dismiss the feature announcement.
Once the announcement has been opened or dismissed, it will not appear until the next feature announcement.
The link to the release notes can always be opened from the About panel.
📘 Application Settings
Language
Select a language for the Desktop Synchronisation App.
Start on system startup
When activated, the app starts automatically after the Windows start-up.
📘 Uploading Files
Click
 .
.Select one or several files in the Explorer.
Drag and drop the files to the related project in GeoCloud Drive.
📘 Menu
Select:
About
Help
Log Out
Close
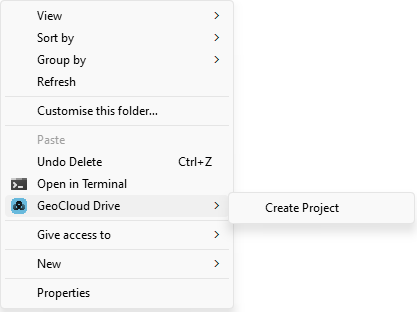
📘 Create a project from the context menu of the File Explorer
Right click within the File Explorer. The context menu shows a new section called GeoCloud Drive.
In Windows 11 you need to click on Show more options to see the GeoCloud Drive section.
Within this section, press “Create project”.
Enter the name of the project in the pop-up window.

Once the project has been created, a new File Explorer window opens with the new project.
Content can immediately be added.
The access management for the project must be done within the Web App.